创建安装、启动、停止、卸载服务的Windows窗体
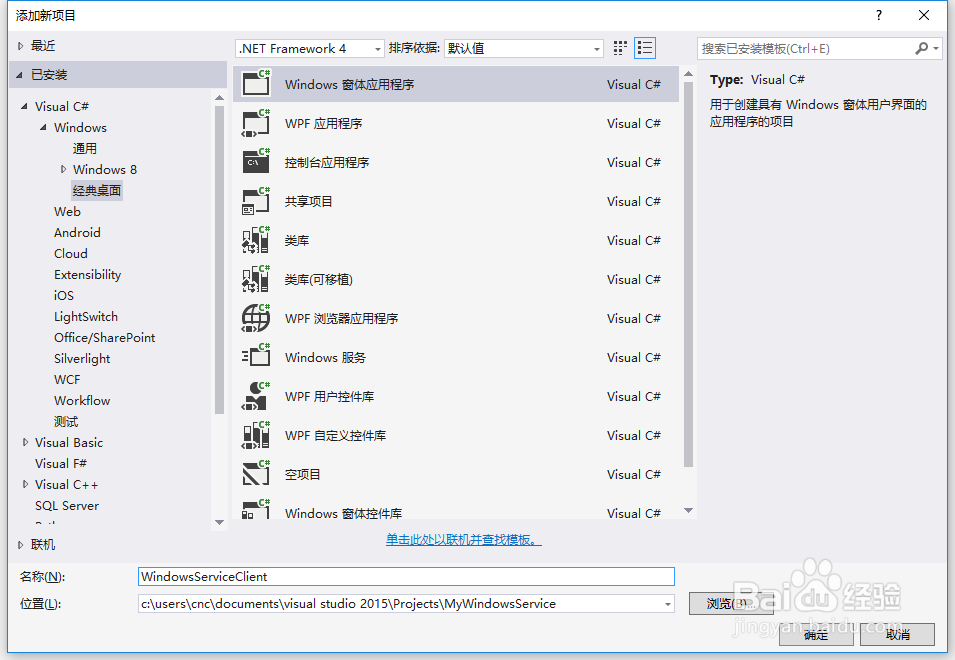
1、在同一个解决方案里新建一个Windows Form项目,并命名为WindowsServiceClient,如下图所示:
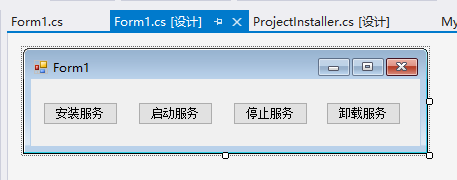
2、将该项目设置为启动项目,并在窗体内添加四个按钮,分别为安装服务、启动服务、停止服务及卸载服务,如下图所示:
3、按下F7进入代码编辑界面,引用“System.ServiceProcess”及“System.Configuration.Install”,并输入如下代码:
using System;
using System.Collections;
using System.Windows.Forms;
using System.ServiceProcess;
using System.Configuration.Install;
namespace WindowsServiceClient
{
public partial class Form1 : Form
{
public Form1()
{
InitializeComponent();
}
string serviceFilePath = $"{Application.StartupPath}\\MyWindowsService.exe";
string serviceName = "MyService";
//事件:安装服务
private void button1_Click(object sender, EventArgs e)
{
if (this.IsServiceExisted(serviceName)) this.UninstallService(serviceName);
this.InstallService(serviceFilePath);
}
//事件:启动服务
private void button2_Click(object sender, EventArgs e)
{
if (this.IsServiceExisted(serviceName)) this.ServiceStart(serviceName);
}
//事件:停止服务
private void button4_Click(object sender, EventArgs e)
{
if (this.IsServiceExisted(serviceName)) this.ServiceStop(serviceName);
}
//事件:卸载服务
private void button3_Click(object sender, EventArgs e)
{
if (this.IsServiceExisted(serviceName))
{
this.ServiceStop(serviceName);
this.UninstallService(serviceFilePath);
}
}
//判断服务是否存在
private bool IsServiceExisted(string serviceName)
{
ServiceController[] services = ServiceController.GetServices();
foreach (ServiceController sc in services)
{
if (sc.ServiceName.ToLower() == serviceName.ToLower())
{
return true;
}
}
return false;
}
//安装服务
private void InstallService(string serviceFilePath)
{
using (AssemblyInstaller installer = new AssemblyInstaller())
{
installer.UseNewContext = true;
installer.Path = serviceFilePath;
IDictionary savedState = new Hashtable();
installer.Install(savedState);
installer.Commit(savedState);
}
}
//卸载服务
private void UninstallService(string serviceFilePath)
{
using (AssemblyInstaller installer = new AssemblyInstaller())
{
installer.UseNewContext = true;
installer.Path = serviceFilePath;
installer.Uninstall(null);
}
}
//启动服务
private void ServiceStart(string serviceName)
{
using (ServiceController control = new ServiceController(serviceName))
{
if (control.Status == ServiceControllerStatus.Stopped)
{
control.Start();
}
}
}
//停止服务
private void ServiceStop(string serviceName)
{
using (ServiceController control = new ServiceController(serviceName))
{
if (control.Status == ServiceControllerStatus.Running)
{
control.Stop();
}
}
}
}
}
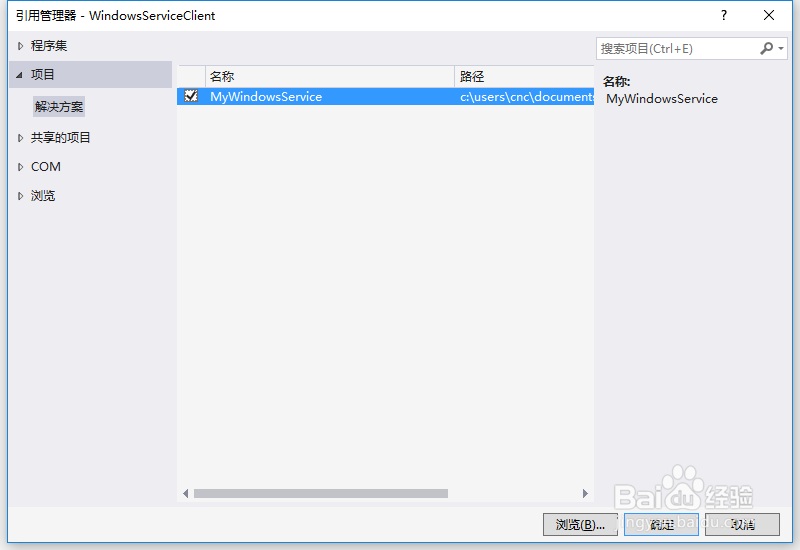
4、为了后续调试服务及安装卸载服务的需要,将已生成的MyWindowsService.exe引用到本Windows窗体,如下图所示:
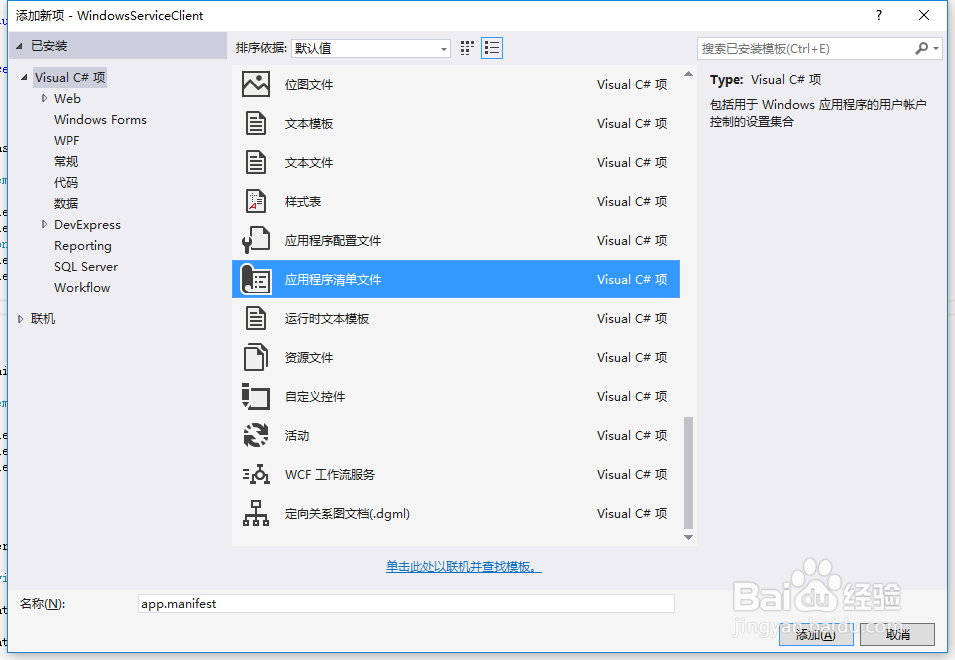
5、由于需要安装服务,故需要使用UAC中Administrator的权限,鼠标右击项目“WindowsServiceClient”,在弹出的上下文菜单中选择“添加”->“新建项”,在弹出的选择窗体中选择“应用程序清单文件”并单击确定,如下图所示:
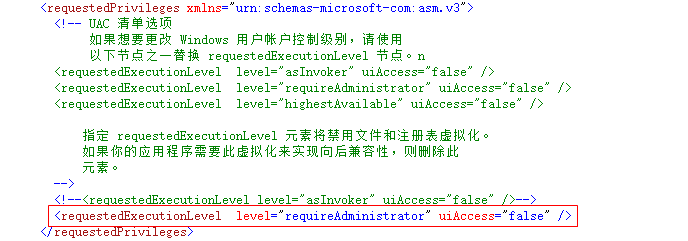
6、打开该文件,并将<requestedExecutionLevel level="asInvoker" uiAccess="false" />改为<requestedExecutionLevel level="requireAdministrator" uiAccess="false" />,如下图所示:
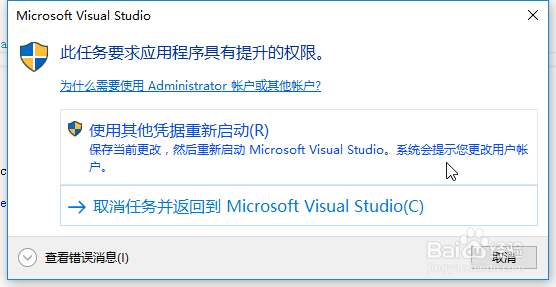
7、IDE启动后,将会弹出如下所示的窗体(有的系统因UAC配置有可能不显示),需要用管理员权限打开,如下图所示:
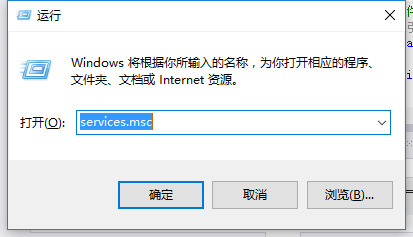
8、重新打开后,在IDE运行WindowsServiceClient项目;使用WIN+R的方式打开运行窗体,并在窗体内输入services.msc后打开服务,如下图所示:
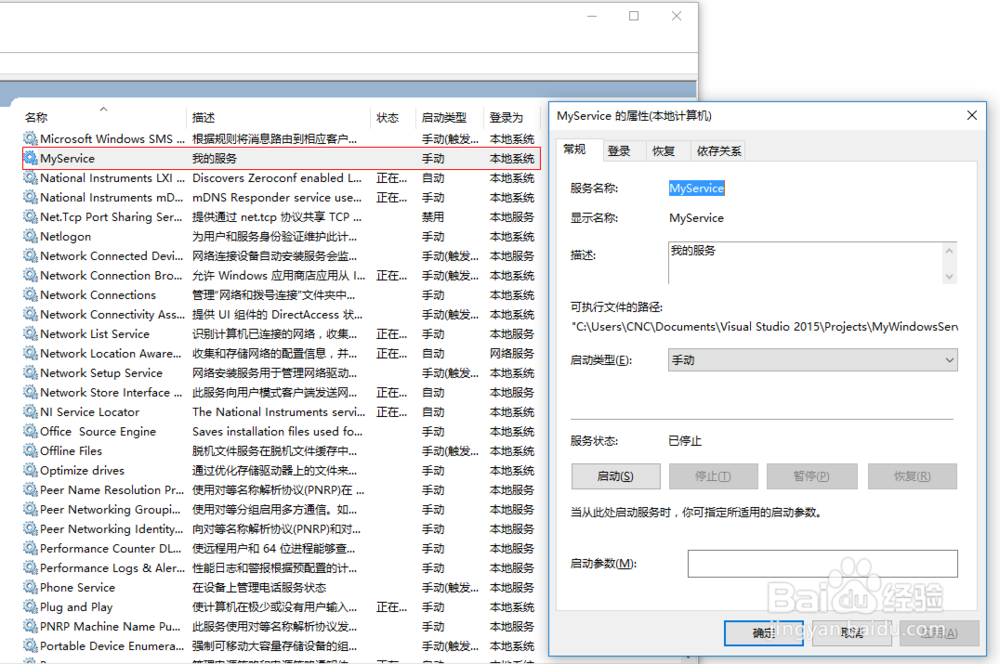
9、点击窗体内的“安装服务”按钮,将会在服务中出现MyService,如下图所示:
10、点击“运行服务”按钮,将启动并运行服务,如下所示:

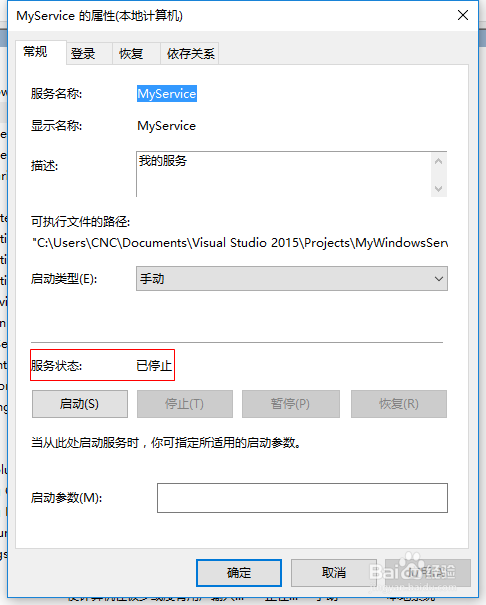
11、点击“停止服务”按钮,将会停止运行服务,如下图所示:
12、点击“卸载服务”按钮,将会从服务中删除MyService服务。
以上启动及停止服务将会写入D:\MyServiceLog.txt,内容如下所示:
