Yii2.0使用教程(二)
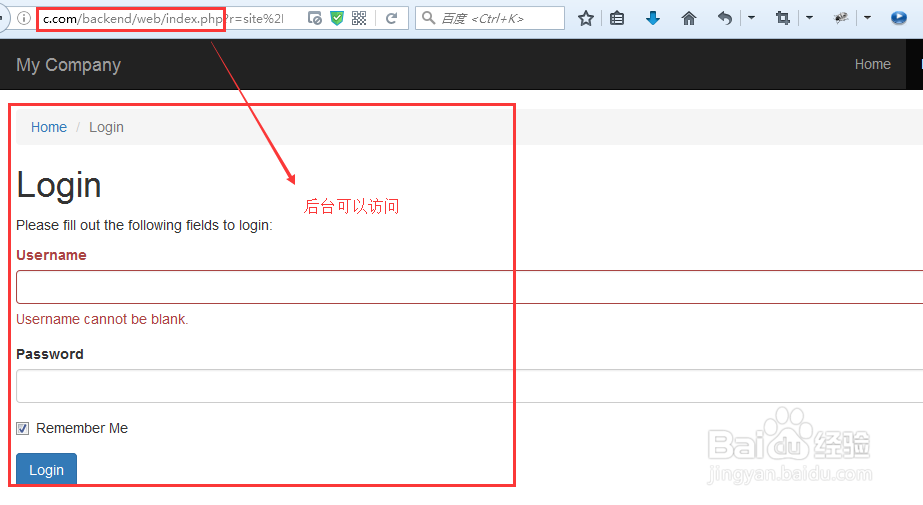
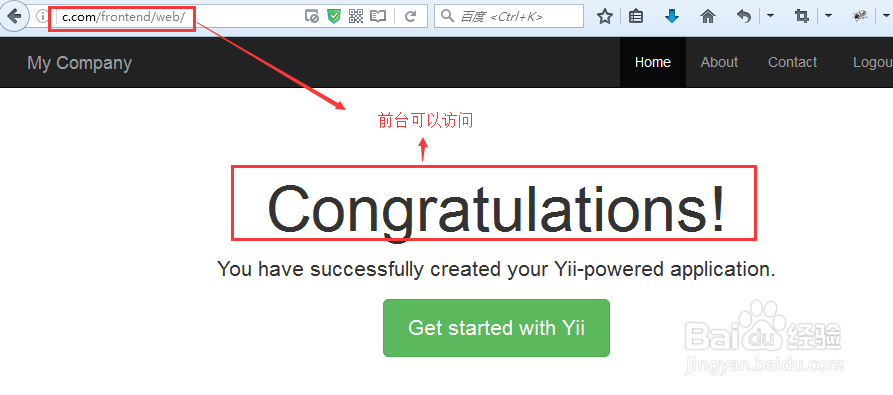
1、回顾一下上一节做好的前台和后台访问如图所示。
我们想把
后台访问:
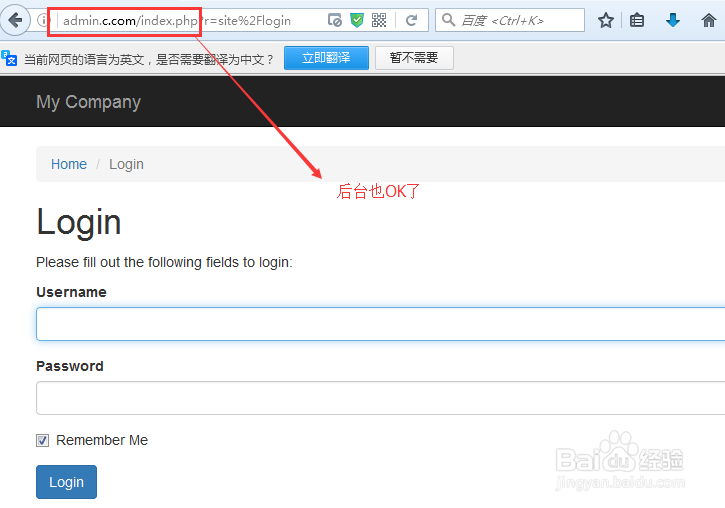
http://c.com/backend/web/index.php 变成 admin.c.com
前台访问:
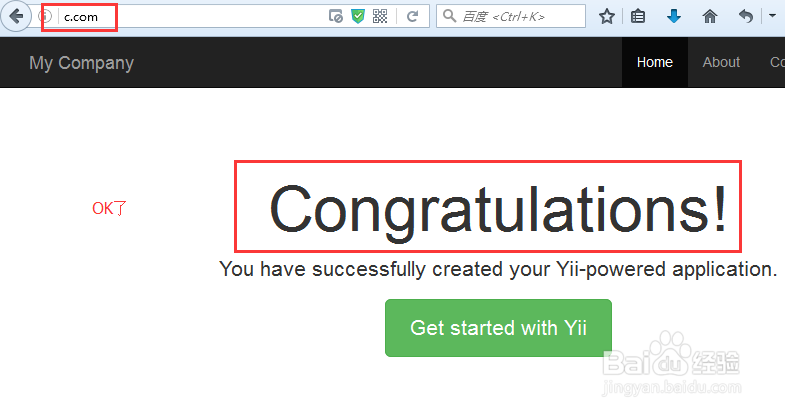
http://c.com/frontend/web/index.php 变成 c.com
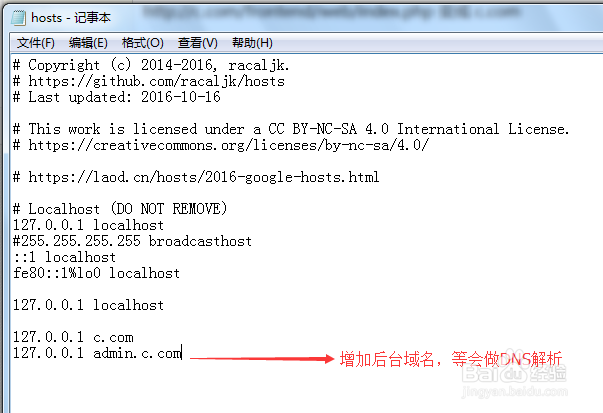
2、2.修改hosts文件
路径:windows xp/2003/vista/2008/7/8用户HOSTS文件是在“c:\windows\system32\drivers\etc
增加:
127.0.0.1 admin.c.com
保存
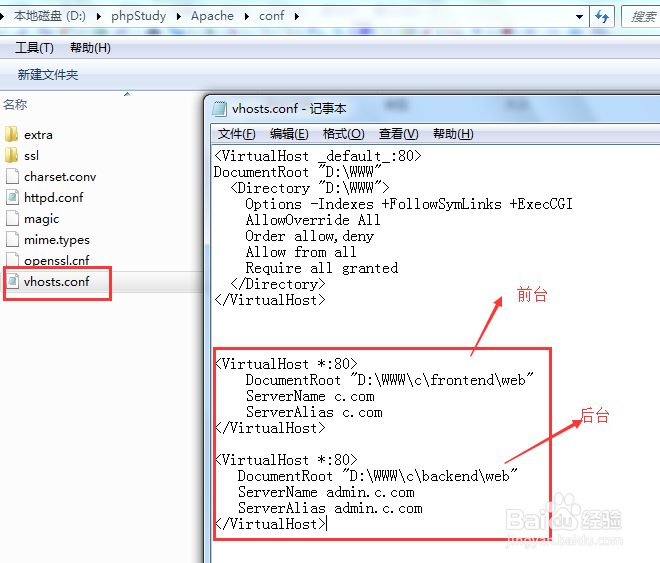
3、3. 打开D:\phpStudy\Apache\conf\vhosts.conf
增加内容:
<VirtualHost *:80> DocumentRoot "D:\WWW\c\frontend\web" ServerName c.com ServerAlias c.com </VirtualHost> <VirtualHost *:80> DocumentRoot "D:\WWW\c\backend\web" ServerName admin.c.com ServerAlias admin.c.com </VirtualHost>
修改成如下图所示
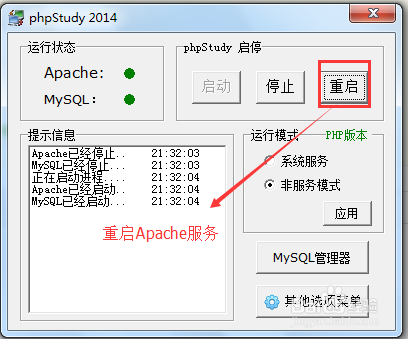
4、重启Apache 服务 ,访问下面的域名看看
前台:c.com
后台:admin.c.com
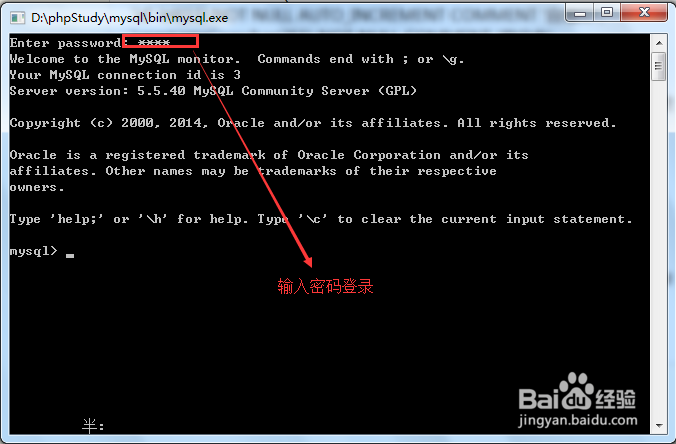
5、链接数据库,完成登录和注册功能
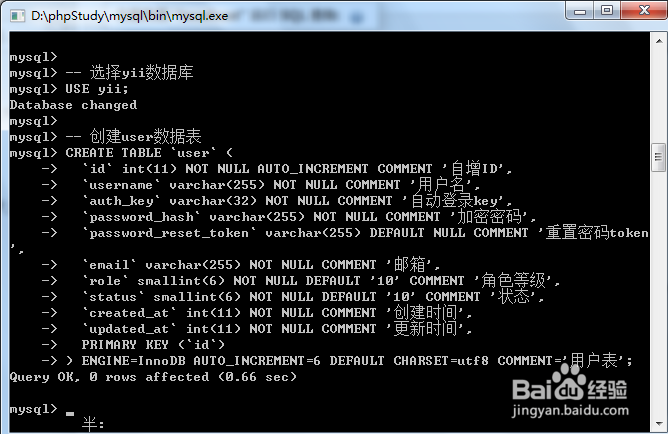
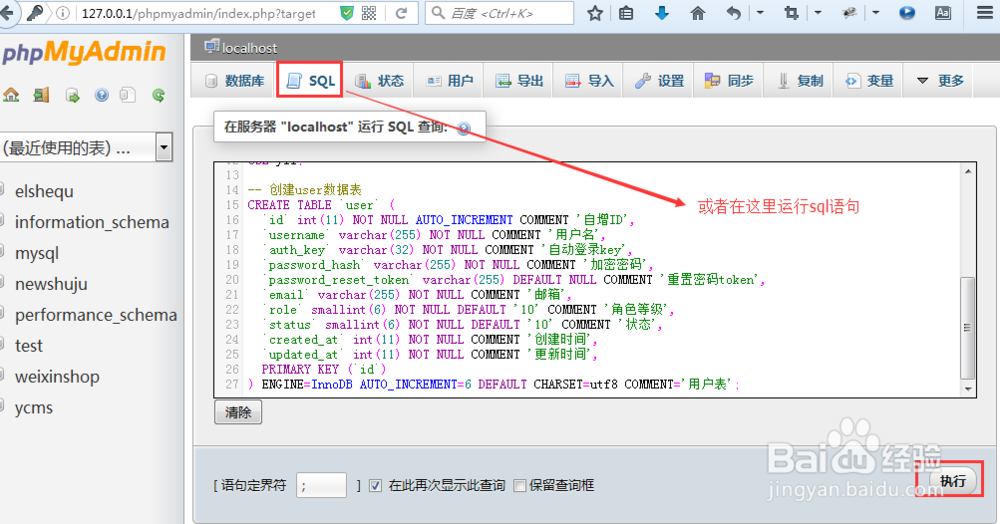
创建数据库和user数据表:
sql语句如下:
-- 创建数据库的同时,设置字符集编码为UTF8CREATE DATABASE `yii` DEFAULT CHARACTER SET utf8 COLLATE utf8_general_ci;
-- 选择yii数据库USE yii;
-- 创建user数据表
CREATE TABLE `user` ( `id` int(11) NOT NULL AUTO_INCREMENT COMMENT '自增ID', `username` varchar(255) NOT NULL COMMENT '用户名', `auth_key` varchar(32) NOT NULL COMMENT '自动登录key', `password_hash` varchar(255) NOT NULL COMMENT '加密密码', `password_reset_token` varchar(255) DEFAULT NULL COMMENT '重置密码token', `email` varchar(255) NOT NULL COMMENT '邮箱', `role` smallint(6) NOT NULL DEFAULT '10' COMMENT '角色等级', `status` smallint(6) NOT NULL DEFAULT '10' COMMENT '状态', `created_at` int(11) NOT NULL COMMENT '创建时间', `updated_at` int(11) NOT NULL COMMENT '更新时间', PRIMARY KEY (`id`)) ENGINE=InnoDB AUTO_INCREMENT=6 DEFAULT CHARSET=utf8 COMMENT='用户表';
6、修改数据库配置文件,完成注册功能
后台数据库配置:
/backend/config/main-local.php
前台数据库配置:
/frontend/config/main-local.php
添加代码如下配置:
'db' => [ 'class' => 'yii\db\Connection', 'dsn' => 'mysql:host=localhost;dbname=yii', 'username' => 'root', 'password' => 'root', 'charset' => 'utf8', ],

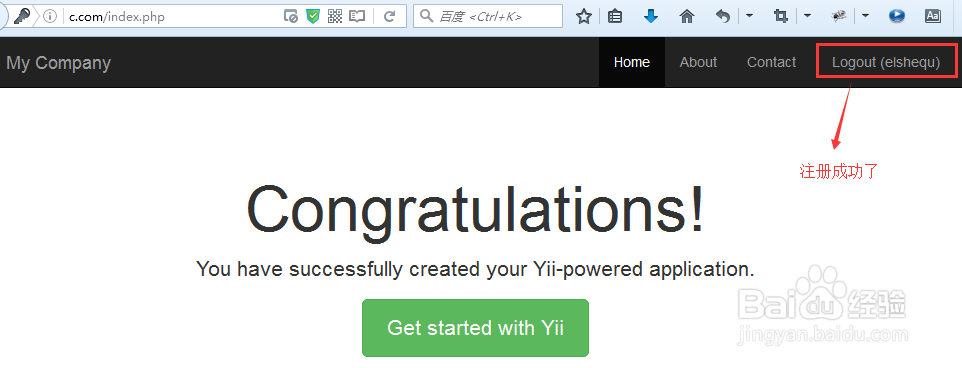
7、注册用户看看